Savor the delight of homegrown potatoes with their fresh and crispy flavor by cultivating them in your own containers. Whether you prefer them baked, mashed, fried, or roasted, growing potatoes in containers is a rewarding experience that allows you to enjoy these versatile tubers in countless ways. If you’re eager to learn the process of container potato farming, you’ve come to the right place.
Step 1: Understanding the Growth Process of Potatoes
Before you start your container potato journey, it’s essential to grasp the growth process of potatoes. Potatoes have ‘eyes’ on their surface, and under suitable conditions, these eyes sprout, leading to the formation of stems. These stems develop into plants above the soil, and the energy surplus from these plants is directed downwards, resulting in the formation of tubers, commonly known as potatoes.
Step 2: Choose the Right Potato Variety for Container Cultivation
Selecting the suitable potato variety is crucial for successful container cultivation. In regions with shorter growing seasons, such as the low desert of Arizona, opt for “early” and “mid-season” determinate potato varieties. Determinate varieties grow rapidly and provide a smaller harvest in a shorter time frame (around 60-90 days). Some recommended determinate varieties include Yukon Gold, Purple Viking, and All Red.
For areas with longer cultivation seasons, go for indeterminate or “late season” potato varieties. These potatoes yield a larger harvest over a longer period, usually between 110 and 135 days to fully mature. Indeterminate varieties continue to produce new potatoes along the stem until they are harvested or stopped by frost. Consider trying varieties like Russian Blue, Canela Russet, and Ramona.
For the best results, always purchase certified disease-free seed potatoes from reputable online vendors or gardening centers.
Step 3: Prepare the Potatoes for Planting
To prepare the potatoes for planting, place them in an area with temperatures ranging from 60-70℉ and expose them to light. This process, known as ‘chitting,’ promotes potato sprouting. Once the potatoes have sprouted, if they are larger than an egg, slice them into pieces, making sure each piece has 2-3 eyes.
Step 4: Timing the Potato Planting
In cooler regions, plant your potatoes just after the final frost date. However, if you are in the low desert of Arizona, the ideal planting time is anytime from September through January.
Be cautious of frost, as potatoes are sensitive to it. If a hard frost kills your plants, harvest the potatoes, regardless of their size, within a week or two to prevent decay.
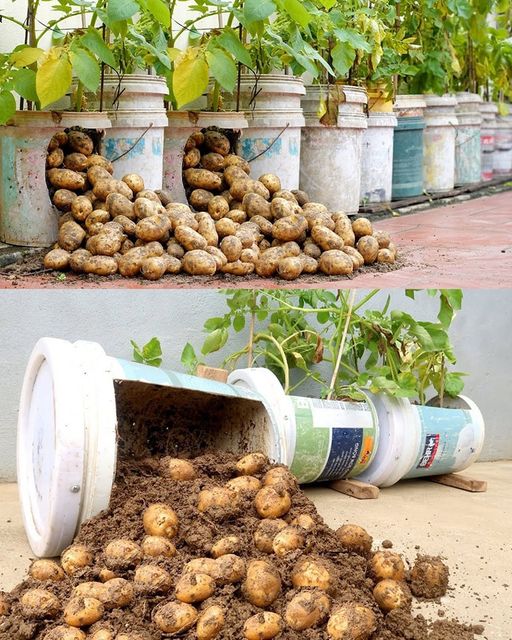
Step 5: Selecting a Suitable Container
Potatoes are not picky about their growth container. You can use various options such as trash cans, compost sacks, or burlap bags. One preferred method is growing potatoes in 40-gallon grow-bags. No matter which container you choose, follow the fundamental planting principles outlined below to ensure success.
Step 6: Planting the Potatoes in Containers
Pair the quantity of seed potatoes with the size of the container to avoid overcrowding. As a basic rule, each potato plant requires approximately 3 gallons of space to grow optimally. Overcrowding may result in smaller potatoes.
Add a 3-4 inch layer of loose soil mixed with compost at the base of the container. Potatoes thrive in slightly acidic soil, so consider using a soil mix formulated for acid-loving plants or enhance your soil with an acid mix fertilizer following package instructions.
Step 7: Properly Water the Potatoes in Containers
Consistent moisture is essential for potato growth in containers since they cannot draw moisture from the surrounding soil. Consider using a drip line inserted in each grow bag for uniform watering. It’s crucial to maintain soil that’s evenly moist but not soaked. Allow some drying between watering sessions.
Continued on next page (page 2)
ADVERTISEMENT
